


How to Paint Furniture: An Instruction Guide for Beginners
Hello everyone! Here at Country Chic Paint we are all DIY’ers with creative souls; we love refinishing and painting furniture and doing all things crafty!
The most common questions we get from our customers are always the basics: “How do you paint furniture?” or “How do I get that beautiful, professional looking finish that I see all the time?” and “Do I need to sand or prime my furniture before I paint it?”
In this tutorial we’ve got answers to all of those questions, and more!
How to Paint Furniture in 5 steps:
- Step 1: Select the right tools
- Step 2: Prep your piece of furniture
- Step 3: Paint your piece of furniture
- Step 4: Special Techniques and Artistic Effects
- Step 5: Finishing it up
Are you ready to get started? Okay, let’s go!
What Tools and Supplies Do I Need to Paint My Furniture?

- Mask (for when you are sanding, spraying, stripping paint, etc.)
- Vinegar and water mixed in a 1:3 ratio
- Lint free cloths (old, clean t-shirts or microfiber towels work great)
- Drop cloth to protect your floor
- Medium and fine grit sandpapers (150 grit and 320 grit or higher)
- Ultra fine Scotch Brite style abrasive pads
- Spackle/mud/wood filler if you are needing to do any small repairs
- Spackle/mud spatula
- Screwdrivers to remove hardware and a container to hold the hardware so you don’t misplace it
- Rubbing alcohol or mineral spirits if you need to remove a waxed surface first
- Clear shellac or Zinsser BIN stain blocking primer if you will be painting over a surface with strong wood tannins or stains
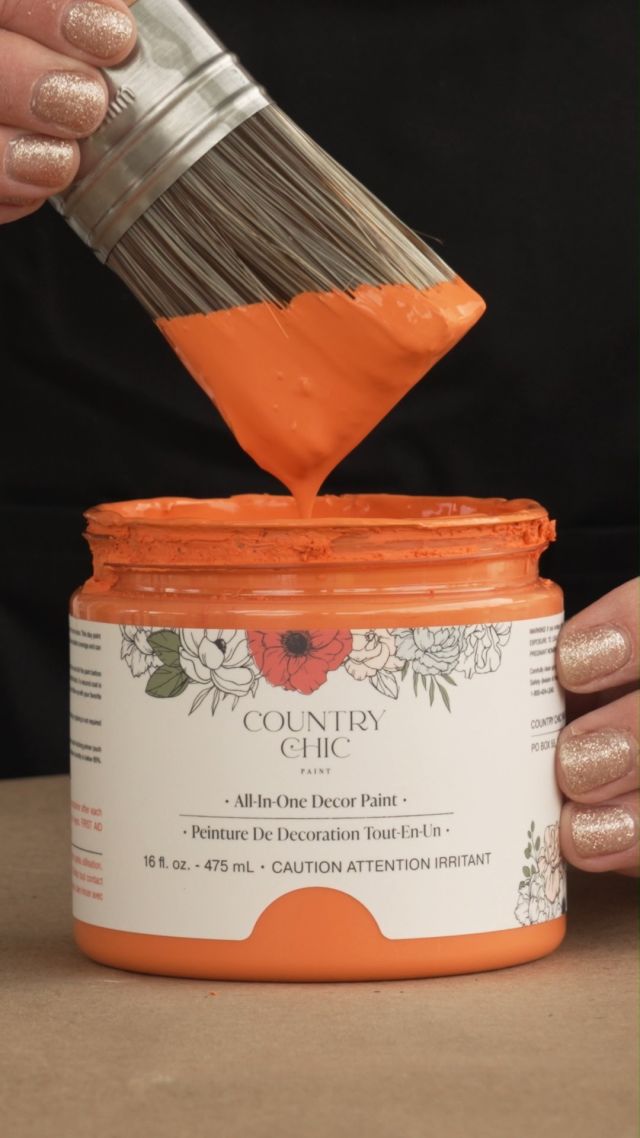
- High quality synthetic bristle paint brush, round painting sponge, or paint sprayer depending on your preference
- Water bottle with a fine mist spray option
- Paint
- Top coat of choice (wax; hemp oil; water based Clear Coat)
Do I Have to Prep Before I Paint?
Surface prep and having a nice clean “canvas” is always the best way to start any painting project. So many products on the market advertise they are “No-Prep” and quite frankly, that’s more of a generous (and often misleading) marketing slogan than anything; it’s really only true in specific circumstances where the surface is perfectly clean, doesn’t have any repairs to be made, and isn’t super shiny or smooth. At the very least, more often than not, you will need to take a few minutes to clean it well and possibly sand a little bit to scuff up the surface.
Removing all the hardware like hinges, drawer or cupboard pulls and handles (and storing them in a Ziploc type bag or container where they won’t get lost!) just makes life easier. You could tape over them and paint around them, but if you take the time to remove the hardware before you start painting, it will allow you to create that nice, even, professional looking finish.
If there are little dings, scratches or other imperfections, you might want to repair those and in that case, you’ll most likely need to sand the fixed areas so it all blends in. You’ll also want to sand and clean up any chipping or flaking; prime it (or sand and scuff it up) if it is a super shiny or smooth surface; and/or stain block, before you even start painting.
Do you always need to do these things? No, not at all. When you are new to the world of painting furniture it’s just getting used to figuring out what type of surface prep your furniture (or project) will need before you paint. But once you get more experience you’ll start to get a good feel for what is needed and the process will start to speed up for you.
What Should I Use to Clean my Furniture Before I Paint It?

We always recommend giving your piece of furniture a really good scrub down before you start painting, even if this is all you have to do. Something as simple as vinegar and water in a 1:1 ratio and a Scotch Brite style abrasive pad is often enough. TSP is also an excellent choice as well if it is really grimy and needs an extra cleaning boost. Just make sure you rinse the surface really well with clean water and a cloth to remove any traces or residue and let it dry before you start to paint.
Tip: Stay away from any soaps or detergents that have natural oils or surfactants in them simply because those can affect how the paint adheres to the surface – water based paint/products don’t like to stick to something that has any oils on the surface.
If you aren’t sure whether or not your cleaner has any oils or surfactants in it, it’s not a big deal, simply wipe the surface down with some rubbing alcohol or mineral spirits to remove any traces of that cleaner and keep it in mind for next time.
How do I Paint Over a Damaged Surface?

If your project has peeling, chipping paint on it, you’ll definitely want to use a scraper and sandpaper to smooth it out before you begin painting.
For small dents and dings, use wood filler to smooth them out. For larger cracks and gouges, something even harder like Bondo works best.
If you’re planning to replace the hardware on your piece, this is also a good time to fill your old hardware holes.
Do I Have to Sand my Furniture Before I Paint It?

That depends…most furniture paint on the market already has a built in primer to help with adhesion, but if you are painting glass or something with a high gloss or shiny finish (think IKEA style laminate furniture) then taking a few minutes to scuff the surface up a little will really help. Use a medium or finer grit sandpaper (e.g. 80 to 120+) and just go over it lightly to remove that gloss or shine. Just make sure of course that you wipe the surface down with a damp cloth and get rid of all the dust.
Laminate furniture tends to be super smooth, often shiny, and non porous (similar to glass) so sometimes it doesn’t have enough ‘tooth’ or grit for the first couple coats of paint to really hold on to. If you aren’t wanting to sand, then a coat of our Clear Bonding Primer will work as well.
WARNING! Removal of old paint by sanding, scraping or other means may generate dust or fumes that contain lead. Exposure to lead dust or fumes may cause brain damage or other adverse health effects, especially in children or pregnant women. Controlling exposure to lead or other hazardous substances requires the use of proper protective equipment, such as a properly fitted respirator (NIOSH approved) and proper containment and cleanup. For more information, read this article, call the National Lead Information Center at 1-800-424-LEAD (in US) or contact your local health authority.
Do I Need to Prime My Furniture Before I Paint It?

Whether it is chalk-style paint, mineral paint, clay based paint, latex paint, etc, most paints on the market these days already have a primer mixed in to help with adhesion.
Like we mentioned previously, some things will need an extra little “boost” when it comes to adhesion simply because the surface is so smooth and non porous and thus it can be harder for the paint to grip on to. In these cases a coat of Country Chic Paint’s Clear Bonding Primer works perfectly.
What Causes Paint to Turn Yellow?
This my friends, is called “bleed through” or “yellowing” and O.M.G…we know first hand how frustrating it is when that happens!
When the tannins or stains in the wood get exposed to the water in the paint (and this goes for any water based paint or product out there), they get released and come up to the surface. Thankfully, it is super easy to avoid (and if you are here because you are needing to find out how to fix it, we can also assure you it is super easy to fix)!
So, when you paint your oak furniture a lovely soft white (like Country Chic Paint’s Crinoline for example), and then as the days or months go by, you start to see these odd little yellow patches here and there, it isn’t the paint itself that is yellowing – it’s the tannins coming through to the surface. If you take the time to ‘seal them in’ then you can prevent this from happening.

Being proactive will save you a lot of time and frustration, so take a look at the piece of furniture you are wanting to paint and determine:
The color you are wanting to paint it. Is it is a lighter toned or white based color? Yes?
Then ask yourself the next question:
Is the piece of furniture (or the surface you are painting over) made from any one of the following types of wood: Oak, Mahogany, Pine, Cherry, Cedar, Redwood, or is it stained with any type of wood stain? Yes?
Then you will need to stain block it to prevent that bleedthrough effect from happening.
The fastest and easiest way to prevent bleedthrough is simply giving the surface a quick coat of clear Zinsser Shellac or Zinsser BIN Ultimate Stain Blocking Primer.
Shellac is clear, easy to apply, dries fast, and will block the stains or tannins and prevent them from bleeding through and causing that yellowing effect.
The Zinsser BIN is white based and a bit more “heavy duty” than the clear shellac so it takes a little longer to dry. It is great for sealing in knots in wood (think pine) and any odors (ie musty smells, cigarette smoke etc).
But, if you are painting something white and needing to stain block anyway, the Zinsser BIN is handy because it’s white in color as well and will save you a bit of time that way. We tend to save the Zinsser BIN around here for when we are dealing with heavy duty stains, strong wood tannins, or really old pieces we’ve rescued that might have some lingering musty or nicotine type smells we just can’t get rid of.
Overall in our experience, if you aren’t sure what might be lurking below the surface and you’re painting your furniture with a light color, then the best thing is to be proactive and give it a coat or two of clear shellac and seal in any possible stains and tannins in so you aren’t having to worry about it later.
Now, if you have already painted your piece and you have encountered bleed through or yellowing during the process (or even after when you applied a water based top coat), there is no need to panic.
All you need to do in this case is just go over it with a quick coat of shellac and that will seal in and block the stains/tannins from bleeding through any further. Once the shellac is dry, go back and paint over it again with your paint, let it all dry like you normally would, and top coat it again.
The main thing to remember, is that if you have bleed through or yellowing, you do not need to sand it all down and start over! It may look like a big issue, but we promise you it is super easy to fix!
Can I Paint Over Furniture if it Has Been Waxed Before?
If the piece of furniture you are wanting to paint or refinish has been previously sealed with wax, or it’s something that was cleaned and polished with popular wax/oily based sprays and cleaners, you will definitely need to remove this first to ensure your paint adheres and cures properly.
The first thing to know is do not try to sand it off!
Sanding the wax off will not work because it pushes the wax/oils deeper into the surface, ‘gums up’ your sandpaper and essentially won’t remove it. If you feel the surface will need to be sanded at some point, then remove the wax (or furniture polish residue) first.
The best and easiest way to remove a waxed surface (or get rid of a waxy polished cleaner that’s been applied over the years) is using mineral spirits. Simply wipe the mineral spirits on the surface, let it sit for a few minutes and use a rag to wipe it off. If you need to get into tight spots or little nooks and crannies, a toothbrush or 0000 steel wool works perfect.
If you don’t have any mineral spirits on hand, you can also use rubbing alcohol to remove that waxy finish too. Keep in mind you might have to do this a couple of times depending how much wax or residue there is.
Once you’ve removed that waxy surface, do a little test patch with your paint – this is what we call the “Scratch Test” around here. Paint a small section, let it dry thoroughly, and then go over it with a fingernail to see if you can easily scratch the paint off.

If you can scratch the paint off easily, chances are there is still something interfering with the paint adhering. So, going over it again one more time with the rubbing alcohol or mineral spirits, and then maybe a bit of sanding if necessary to scuff the surface up, is usually all that is needed.
Choosing a Paint to Use: Furniture Painting and Chalk-Style Paint
If you are looking for the easy to distress, lovely matte finish that chalk-style paint gives, you’ll find our paint is perfect! It can be used on furniture (including baby/children’s furniture), as well as raw wood, glass, metal, plastic, fabric, and more.
Country Chic Paint’s All in One Paint is an ultra low VOC clay based paint and we specifically designed it to be a superior alternative to chalk-style paints in every way. Not only that, we have had our paint independently tested with the most up to date testing methods, and we can certify that it is truly ULTRA LOW VOC, including the pigments we use in our colors. We are proud to be one of the few companies out there that can back those claims up and provide our test results publicly.
Painting Your Furniture: Tools, Tips, and Tricks for That Amazing Finish
Alright, so you’ve ensured your piece of furniture is cleaned, prepped and ready to be painted! Let’s get this painting party started!
How much paint do I need?
How much paint you need for your project will vary a bit depending on what color you’re painting with, the original finish on the piece, and how you apply the paint. The good news is that we have some tricks to help you make an educated estimate!
Our 32 oz quarts will cover approximately 120 square feet with one coat, 16 oz pints will cover approximately 16 square feet, and 4 oz sample jars will cover approximately 15 square feet. Here’s a quick breakdown to help you decide which size to buy:

What Should I Use to Paint my Furniture?
Having the right tools makes a huge difference! We’ve all learned from experience that cheaper isn’t always better, right? High quality synthetic bristle brushes, good lint free rags, working with a damp brush, painting with nice thin coats and gently sanding in between, will ultimately give you that fabulous end result you have in mind.

Paint Brush? Paint Sprayer? Painting Sponge? Paint Roller? What to use?
The decision on what tool to use when you paint is entirely up to you. If you are just getting started, then you’re probably using a paint brush for now. In that case we recommend choosing a high quality brush with synthetic bristles.
Why a High Quality, Synthetic Bristle Paint Brush is the Best Choice

When it comes to painting with water based paints (whether that is chalk-based paint, clay-based paint, latex paint, etc.), a high quality, synthetic bristle paint brush is better because being synthetic, the bristles don’t absorb the water in the paint. Natural bristles absorb water which tends to make the bristles floppy, over saturated, and ultimately doesn’t always leave the nice clean finish you want.
We also strive to be as ethical, and as environmentally conscious as possible. When we researched how the natural, pure bristle paint brushes are manufactured (even many of the expensive pure bristle brushes from Europe) and found out how the animals are treated when the bristles are harvested and collected, it was a no brainer for us – synthetic bristle brushes were the only way to go.
‘High quality’ means they hold the paint well, clean up easily, and will last a lifetime with proper care and use. They keep their shape and will give you that nice smooth finish with minimal brush strokes. A top of the line synthetic bristle paint brush will also make your paint go farther which saves you money in the long run.
No matter what, we want to make sure you get the best results when you are painting your furniture and we feel it is important to understand that when it comes to paint brushes, spending a little bit more on a high quality, synthetic bristle brush will be an investment you won’t regret.
The Best Way to Paint Furniture With a Paint Brush

Applying the paint in super thin coats is key, especially when it comes to painting furniture with chalk-based paint, clay-based paint, mineral paints, etc. For example four thin coats of paint will give you a better end result and better, smoother coverage compared to applying two thicker coats (which is tempting when you are excited to get something finished or see how it turns out!). And trust us, it won’t take any longer – we promise!
In fact, four thin coats of paint is often faster overall because each coat of paint dries so fast and doesn’t tend to get those gummy brush strokes that can happen sometimes when you try to rush the process with thicker coats (which then takes extra time to go back and fix up).
Most of us here like to paint with a damp brush. This is another little secret to that great, professional looking finish – painting with a damp brush makes the bristles more pliable and helps eliminate the chance of heavy brush strokes and is another way to make the paint go farther.
Start off by running your brush under water and soaking it really well. This gets the brush ready for painting but it also makes it easier to clean by preventing the paint from getting stuck in the ferrule by the handle. Then squeeze the excess water out with a lint free cloth (old t-shirts and microfiber towels work great!). You want to make sure the brush is slightly damp, but definitely not soaking wet.
Have a clean container of water handy and each time before dipping your brush back into your paint, dip the first ⅓ of the brush in the water, dab off the excess water onto your lint free rag, and then dip just the tips of the bristles into your paint and apply in thin coats like we mentioned above.
Another option is, have your water bottle handy and instead of dipping your brush in the water, spritz a bit of water into the tips of your brush, and then dip it in the paint and apply like you usually would.
If you find that your paint is really starting to tack up and dry too fast on you (which is common in the summer or in hotter, drier climates) use your spray bottle on the fine mist setting and lightly spray some water over it to smooth it out with your brush and slow down the drying time a little bit.
Depending on the humidity levels where you are, allow an hour or two of dry time between each coat.
Painting Furniture With a Painting Sponge

A good painting sponge allows you to apply your paint in record time and just by the nature of their design, will lay the paint down in a nice, thin even coat like we are always talking about. They are also the best thing ever to paint anything with spindles!
When we added our round Painting Sponges a few years back to our product line, they were an immediate hit with our customers! These trusty, inexpensive little painting sponges have been at the top of our “most popular products” list ever since!
When using a Painting Sponges, rinse it well under water and squeeze out the excess with a lint free rag before getting started. Pour a small amount of paint into a shallow, clean container that is wide enough to easily fit the sponge into. Dip the sponge lightly in the paint and apply to your piece.
Again, taking into consideration the heat and humidity levels where you are painting or where you live, allow an hour or two of dry time between coats. Thinner coats of paint will always dry faster and more evenly.
Furniture Painting With a Paint Sprayer (aka Spray Gun)
Painting furniture with a spray gun is ultimately the fastest way to paint, but does come with a bit of a learning curve (not to mention a large enough space to work with a sprayer and/or set up a paint tent to keep the ‘spray’ contained). Once you get the hang of using your paint sprayer it will give you a smooth finish and being that you are able to cover larger areas in less time, is a quick way to paint your projects.
Every paint sprayer is different so always refer to the manufacturers instructions.
Usually you’ll need to add about 5-10% water to your paint to thin it out a little bit so it doesn’t clog anything up. You’ll want to do a few trial runs on some scrap pieces to find the right amount of water to add to the paint (and it usually isn’t a lot) before you get started.
Again, apply thin even coats, allowing them to dry a couple hours in between.
Painting Furniture With a Paint Roller
Painting walls with a paint roller is great, but when it comes to painting furniture, we don’t recommend using paint rollers when applying our clay based paint. We found that painting furniture with a roller was harder to control in terms of applying thin coats and it used way more paint than a brush, sponge, or sprayer, which ends up costing more money in the long run. If you do prefer to use a paint roller, make sure it is high quality and lint free.

Start off by rinsing it really well under water to remove any little bits of lint, squeeze the excess water out well, and apply as evenly as possible.
Because the roller tends to lay the paint on thicker in some spots compared to a brush, sponge, or spray gun, it’s important that you make sure you’ve really allowed sufficient drying time in between each coat of paint, otherwise it will get all messy if you go to apply the next coat and certain areas haven’t fully dried yet.
Drying Time For Furniture Paint
Most high quality, water based furniture paints on the market right now are fast drying, especially if you make sure to apply your paint in thin coats. As a general ‘rule of thumb’ a thin coat of paint should dry quickly and be ready for the next coat within 90 minutes or less.
Now, this isn’t taking into consideration the heat or humidity levels where you live or where you are painting, so if it is super humid, it might take longer or you might need a fan to speed the drying time up. If the humidity is low where you live then the drying time might be a little bit faster.
No matter what though, once you’ve achieved the coverage you want with your paint, we recommend giving it a good 12-24 hours to dry thoroughly before glazing, waxing or applying a top coat.
The heat and humidity levels of every home, shop, studio, and overall location is different, so our timelines are general estimates only.
Special Techniques and Artistic Effects When Painting Furniture
When you are painting furniture or doing any type of crafty project really, the options are endless for adding that extra bit of flair to your project! We’ll give you a quick run-down here of some different effects and the products you can use, and then feel free to click on through to those specific tutorials to get more details and instructions.
How to Distress Painted Furniture

Giving your project that shabby chic, time worn and weathered look is super easy with a technique called distressing.
Distressing can be done a few different ways: dry distressing with sandpaper; wet distressing with a damp cloth; or resist distressing technique where you use something oil based or waxy (like our Beeswax Distressing Bar) in the spots you don’t want the paint to adhere to. Feel free to pop over to our page dedicated to distressing for more instruction and inspiration!
Should I Use Wax or Glaze to Highlight Details?
If you are wanting to use wax for an antiqued or weathered effect, or wanting to do something special to highlight little nooks and crannies in your piece (think areas with lots of little carved out details for example) you can use either wax or glaze. Both are great options.
Glaze gives you more versatility in terms of color choices because you can also customize the Clear Glaze with any paint color you want to create something truly unique! Either way before you get started you’ll want to determine what, if anything, you are going to use to seal your piece.
Using Wax on Painted Furniture for Antiquing and Faux Finishes

With all the tinted waxes on the market these days, you too can create that gorgeous Pinterest worthy faux finish on your painted furniture! Use them all over your piece, or just in a few spots here and there for an added highlight.
Antiquing Wax is a deep, rich brown; Black Wax is excellent for giving a deeper tone and color to your finish; Grey Wax is always an excellent choice for making a piece look a bit vintage and weathered; Pearl Wax gives a soft, subtle opalescent glow; and Gold Wax is perfect for adding a bit of a subtle golden sparkle.
One thing that is so important to remember is “wax goes last” and that is for a few reasons: water based products (like paint and top coats) don’t play well with oily or waxy surfaces. And, if you apply Hemp Oil last over the wax, it tends to mix in with the wax and change the effect you were going for.
So no matter what, wax goes last.
Want to use Hemp Oil but also use wax to bring out some details? Wax goes last.
Do you want to top coat your project with Clear Coat but still use the wax for a faux look or finish? Wax goes last.
Say it with us now, “Wax always goes last.”
We have a great tutorial on how to use wax for faux finishes and fun artistic effects, so click here if you want to explore more details and get some inspiration on all the fabulous ways you can use our furniture wax in your painting projects!
Faux Finishes and Glazing Painted Furniture

Glaze is amazing for creating depth and the appearance of texture, especially in popular faux finishes. With a combination of just paint and glaze, the options are absolutely endless in terms of what you can create and the authentic looks you can give your piece! It’s also an excellent alternative to tinted waxes for highlighting details and giving an antiqued look.
Keep in mind, glaze is not a top coat. It is essentially a much more translucent paint. However, because it’s water based, glaze is perfect to use in combination with water based top coats like our Clear Coat, for example.
NOTE: If your painted furniture is something like a dining room table, or kitchen or bathroom cabinets, or anything that is going to get a lot of daily wear and tear, lots of use, and will be wiped down or cleaned on a regular basis, you will want to seal that with 3-4 coats of our Clear Coat. Country Chic Paint’s Clear Coat is one of the most durable top coats on the market because of the diamond level, rock hard finish it has.
For more details and information on Clear Coat pop over to our tutorial for more instructions on how to apply them.
And, to find more inspiration and ideas on all the creative uses for glaze, click here to check out the tutorial!
How to Get a Crackled Finish on Your Painted Furniture

Crackle Medium is a great way to get those wonderful surface cracks and give an aged, weathered effect or even just for a fun layered finish with different colors peeking through. You can use Crackle Medium all over or just in small areas to give it that bit of flair, the options are endless and it is so much fun to use and play around with!
A little tip is if you paint it on thinly, your cracks will be small. If you apply the Crackle Medium thicker, it will give you bigger cracks!
You can get more instruction, inspiration, and details over here on our Crackle Medium Tutorial.
How to Emboss or Add Texture to a Painted Surface

Texture Powder is a perfect way to add some character and of course, texture, to your projects! Mix it up and use it with a stencil to create authentic looking embossed features, or layer it with different paint colors to create a weathered and worn patina.
Texture Powder is an incredibly versatile eco-friendly paint additive that will totally revamp your furniture – it is so much fun to use and the options are endless!
Check out our Texture Powder tutorial for more in depth details, instructions, and inspiration.
Giving Furniture an Authentic, Antique Look

Antiquing Dust combined with Clear Wax is a unique way to create an authentically worn and vintage look. You can apply it in areas where dust would naturally build up over time to give it some added character and age. It’s an excellent option for highlighting those delicate little details on carved or intricate little nooks and crannies in your furniture.
For all the unique ways you can use Antiquing Dust and for more detailed instructions, check out this tutorial.
Finishing it Up: Choosing a Top Coat to Seal Your Painted Furniture
There are a few options when it comes to sealing painted furniture. You have water based top coats, Wax, and oil based (e.g. Hemp Oil) top coats. Knowing which product to use, and when, is half the battle when you are first starting out on the adventure of painting furniture!
Generally it comes down to what the finished surface is going to be used for or subjected to on a day to day basis.
Kitchen or dining table that will be used every day for family meals? Then you will want to use Clear Coat.
A pair of side tables or nightstands? Clear Coat is a great option here!
A beautiful raw wood coffee table? Hemp Oil is an excellent choice.
A bookshelf or something that won’t get a lot of wear and tear or require any daily cleaning/wiping? Our Furniture Wax is the perfect choice and gives a soft, smooth protective finish.
Clear Coat – Water Based Top Coat – Ultra Tough Protective Finish
Clear Coat is an very strong, water-based sealant. This is the product to use when you want to seal kitchen or bathroom cabinets, outdoor furniture, floors, table tops, and anything else that gets a lot of heavy duty use and is exposed to a lot of wear and tear. When people are looking for an ultra tough, super durable top coat – Clear Coat is the answer.
Clear Coat makes your pieces super water-resistant, scratch-resistant, and able to withstand high humidity environments, and constant daily cleaning and wiping down of surfaces.
Sealing Painted Furniture With Wax
Waxes offer light protection and a soft, smooth, buttery finish for low traffic items (i.e. items that won’t need to be wiped down often with cleaners or scrubbed).
To use Furniture Wax as a sealant/top coat on your painted furniture, simply apply a thin layer with a Wax Brush or a clean lint free cloth and buff off with a separate, clean, lint free cloth. If you are applying with a lint free cloth, make sure you have a few extra on hand to buff with separately.
For added protection, apply 2-3 times, waiting about 12-24 hours in between each application. Our Furniture Wax takes approximately 30 days to fully harden and cure, so just be gentle with the waxed surface during this time.

Our all natural waxes are eco friendly and made from 100% beeswax, natural tree nut oils, and carnauba wax. They don’t contain any harsh chemicals or solvents to keep them soft like other waxes on the market; this makes them perfectly safe to use indoors as well as on children’s furniture and toys.
Clear Wax is clear but it will deepen the tone and color of paint. Tinted wax will also add color and depth to your finish and like we mentioned above, it’s also used just for highlighting details on pieces.
To deepen the tone of tinted waxes, simply apply the tinted wax, buff off the excess like usual, and repeat until you get the depth and tone you want. Alternatively, if you use a tinted wax and find it is too dark, apply Clear Wax to tone it down and lighten it up
Every application of wax needs to be buffed off. The surface is buffed correctly when it isn’t sticky to the touch. Wax that is used in little nooks and crannies for highlighting details doesn’t necessarily require buffing unless you want to, so don’t panic if you can’t easily get into that space to buff the wax out.
For more inspiration and details on our waxes and how to use them, pop over to our handy little wax tutorial.
*If you are concerned about nut allergies and want an all natural product to finish your piece, we recommend our Hemp Oil as a perfect alternative!
Sealing Painted Furniture With Hemp Oil
Hemp Oil is a drying oil. What this means is that it hardens (polymerizes) over time as it cures and this makes it an excellent alternative to wax for sealing and finishing your painted furniture! Because it penetrates much deeper into the surface than the waxes or water based top coats, Hemp Oil is perfect for raw wood, outdoor pieces, painted furniture, leather, wooden floors, restoring life to antiques, and more. It’s more matte in appearance once it cures when compared to wax or Clear Coat.
Our Hemp Oil is 100% vegan, natural, and sustainably sourced from Canadian farmers. It’s eco-friendly and totally safe for pregnant women, in addition to being a perfect all natural sealant on babies/children’s furniture and toys.
To use Hemp Oil as a finishing top coat, simply wipe the Hemp Oil onto your fully dried surface using a lint-free cloth and let it soak in. You can also use a paint brush or our round Painting Sponge if that is easier! If a piece is really old and/or really dry, it may need more than one application.
Once you have finished wiping on the Hemp Oil allow it to sit for approximately 12 hours and then use a lint-free cloth to remove/buff away any lingering excess oil. Try not to let any of the oil ‘pool’ on the surface though for longer than a few hours to avoid it possibly starting to cure and get sticky.
If you find after a day or so the finish looks patchy, it just means different areas absorbed more of the oil than others, so simply wipe on another coat, let it sit on the surface for a few hours, and wipe off and buff again.
Sometimes if a piece is really old and or its really dry it might take 2 or 3 applications of Hemp Oil the first time around to really condition it (and then applying the hemp oil once a year as needed if you wish to keep the surface coated and well conditioned).

One of our favorite ways to use Hemp Oil though is to apply it to the surface we are wanting to finish/seal and then use a super fine grit sandpaper (800 grit or higher) and do a ‘wet polish’. It gives the softest, smoothest, most amazing buttery finish. This can be done on painted pieces and also raw wood pieces. Try it! We know you’ll love it!
Check out our Hemp Oil tutorial for all the details and inspiration on how you can use this versatile, all natural oil in your home and on your painted furniture!
Questions or Comments About Painting Furniture?
We’d love to see your projects and what you are working on, so keep us in the loop! You can leave us a comment on Facebook or Instagram, and tag @countrychicpaint. Or even email us or hop on to our live chat. We are total DIY and painting addicts too, so if you have any questions at all, we are always here and happy to help!